
Upgrading jsPsych Demos to a new version of jsPsych
Table of contents
- Before you upgrade
- Structure of the jspych-demos repository
- Cloning the repository and editing in Visual Studio Code
- Making changes in the experiment.html file
- Testing changes locally
- Adding changes to the website
Before you upgrade
The version currently in NivTurk is 8.2.3. There is not much use in upgrading every time a new update is released, with the only exception being specific bugs that were resolved. You should upgrade when a new version is released, because those mark larger changes in the framework. Plan to upgrade when version 9 (marked by 9.x.x) is published.
Set up a meeting with Yael to discuss the current state of jspsych-demos. Are there any demos that should be deprecated? Are there any demos that should be added? Make a list of proposed changes.
Structure of the jspych-demos repository
- If you’re a new lab member, Yael for access to the NivLab GitHub. Once you have access, you can use GitHub Desktop and Visual Studio Code for easy access on your local device.
- Navigate to the jspsych-demos repository - this is where the jsPsych changes will take place.
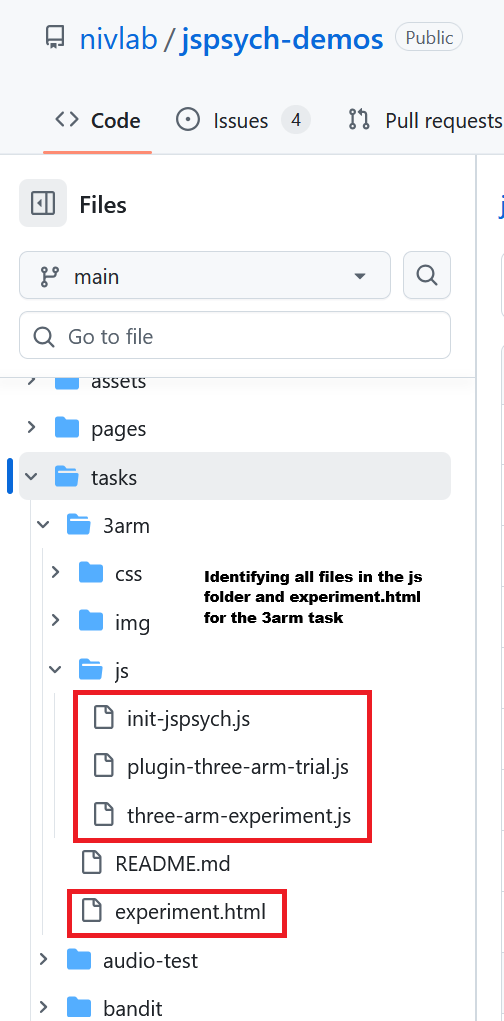
- The main code for the tasks is located in jspsych-demos/tasks/task-name. You will be making changes to the experiment.html file, as well as files in the js folder. Here’s an example of what files to pay attention to for one of the tasks:
Cloning the repository and editing in Visual Studio Code
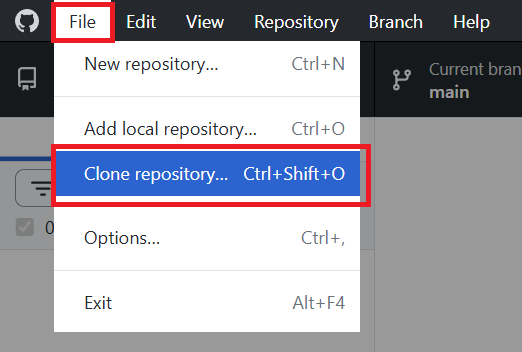
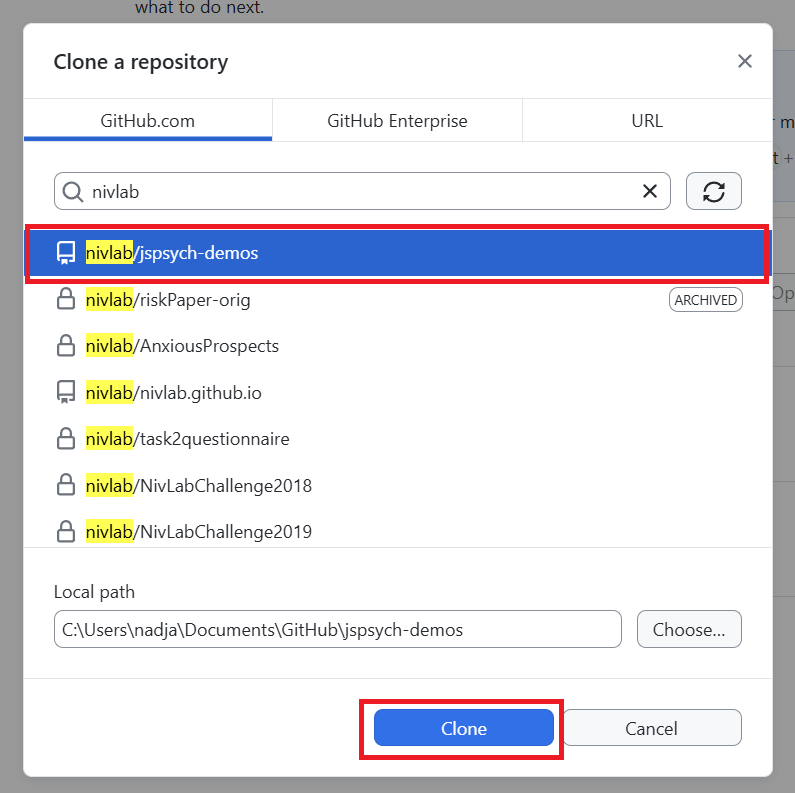
- Clone the repository onto your local device using GitHub Desktop.
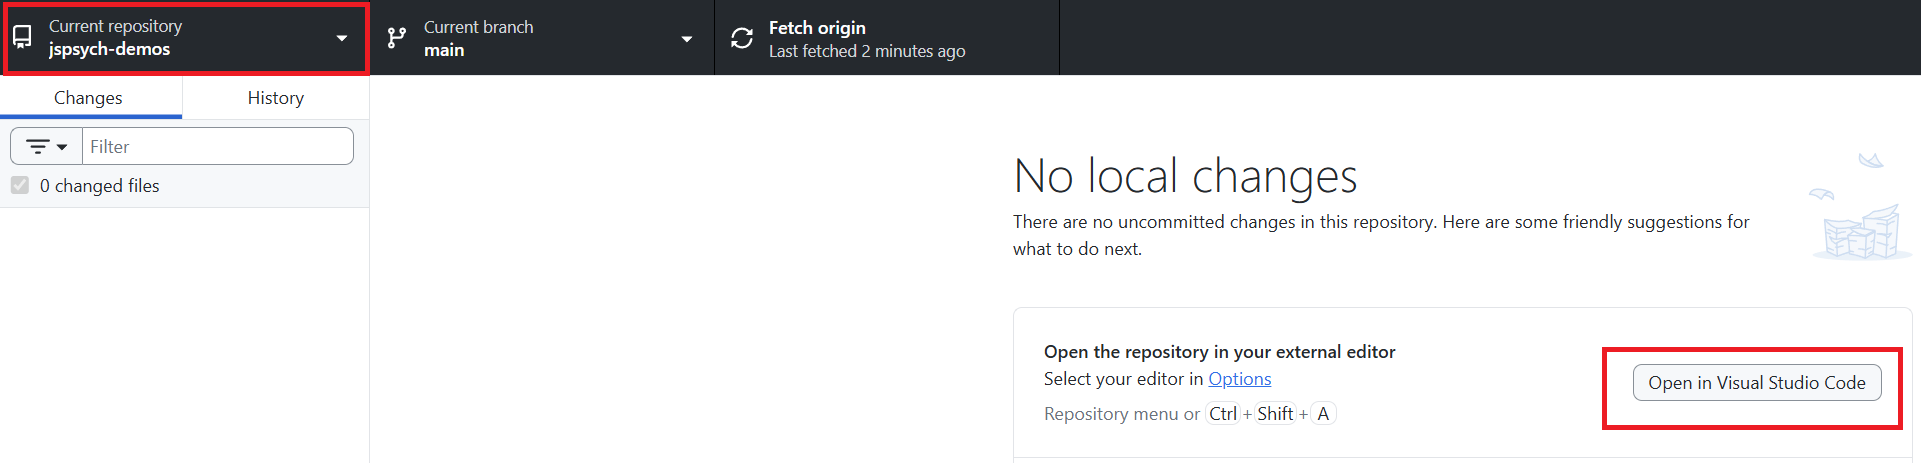
- Once the repository is cloned, you can open it in VS Code, which will allow you to edit code and push changes. Make sure your current repository is jspsych-demos.
Making changes in the experiment.html file
- The main changes you will be making are to the <script> tags.
- First, identify all <script> tags that have https://unpkg.com in them. For these scripts, we will need to go to the jsPsych website to identify if everything is up to date.
- Second, identify all <script> tags that have ./js/ in them. These are local scripts that exist in the js folder of the experiment. Here, we’re manually checking the code for any changes that need to be made.
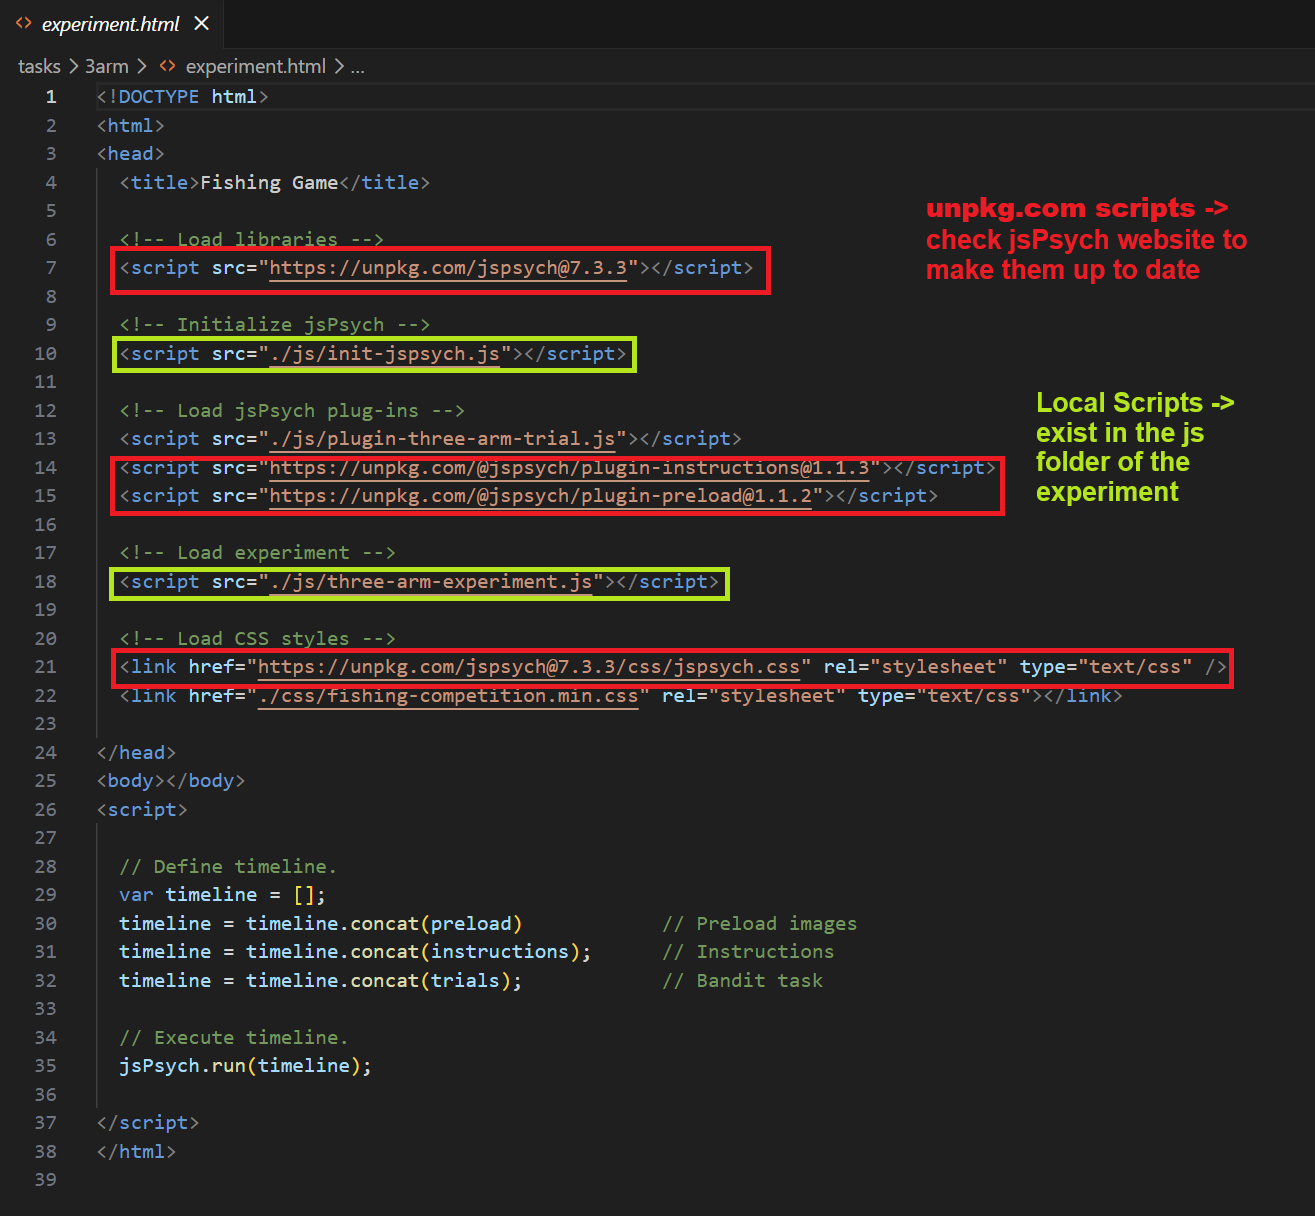
Updating unpkg.com scripts
- The first script that you will see in experiment.html is usually the import for the jsPsych library itself, marked as https://unpkg.com/jspsych@x.x.x. You’ll need to change the version number to the most up-to-date version of jsPsych. In my case, I’ll just replace 7.3.3 with 8.2.3.
- The next scripts are jsPsych plugins, marked as https://unpkg.com/@jspsych/plugin-name@x.x.x. Look at the URL in the script to figure out what plugin you’re looking for. For example,
<script src="https://unpkg.com/@jspsych/plugin-instructions@1.1.3"></script>
is loading the instructions plugin, version 1.1.3.
- Go to the jsPsych website to find the list of all plugins. Locate the plugin you’re looking for, click on its corresponding page, and the script to use in the Install section.
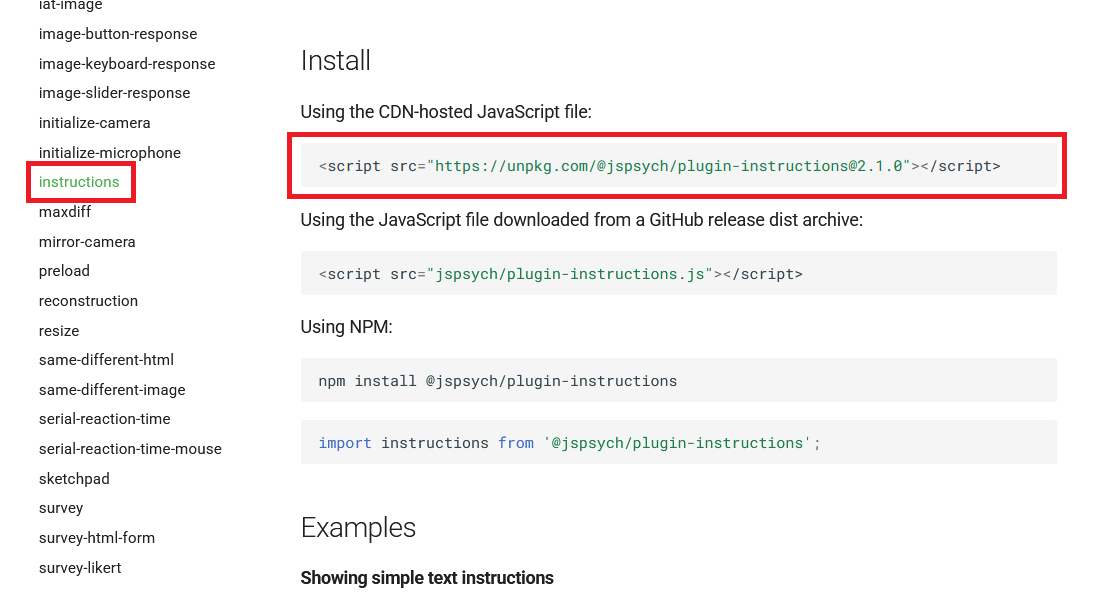
- The most current version of the instructions plugin is 2.1.0, so we should update the script in our code to reflect this new version. Repeat this for all plugins.
- You might also see CSS styles being loaded, marked as https://unpkg.com/jspsych@x.x.x/css/jspsych.css. Replace the version number with the most up-to-date version of jsPsych. In my case, I’ll just replace 7.3.3 with 8.2.3. Save these changes.
Updating local scripts
- Sometimes there are no changes in code necessary. Before starting to inspect code in the js folder, check if the demo is still working.
- Navigate to the demos website, find the demo that you’re working on, and play it so that you know what to expect.
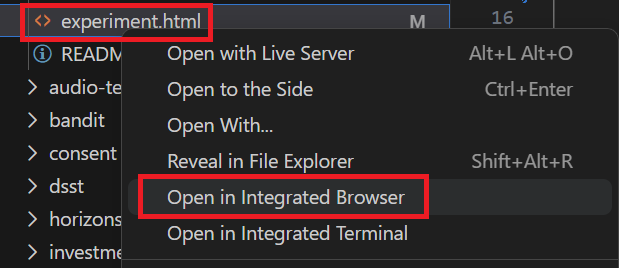
- After that, go to Visual Studio Code, right click on experiment.html, and click on Open In Integrated Browser. This will let you test the task before pushing any changes. Alternatively, you could use the method described in Testing Changes Locally to get the experiment to open in a browser.
- If the task is behaving strangely, use right click and inspect in the integrated browser to get more information about potential errors and warnings. This will open a separate Developer Tools window.
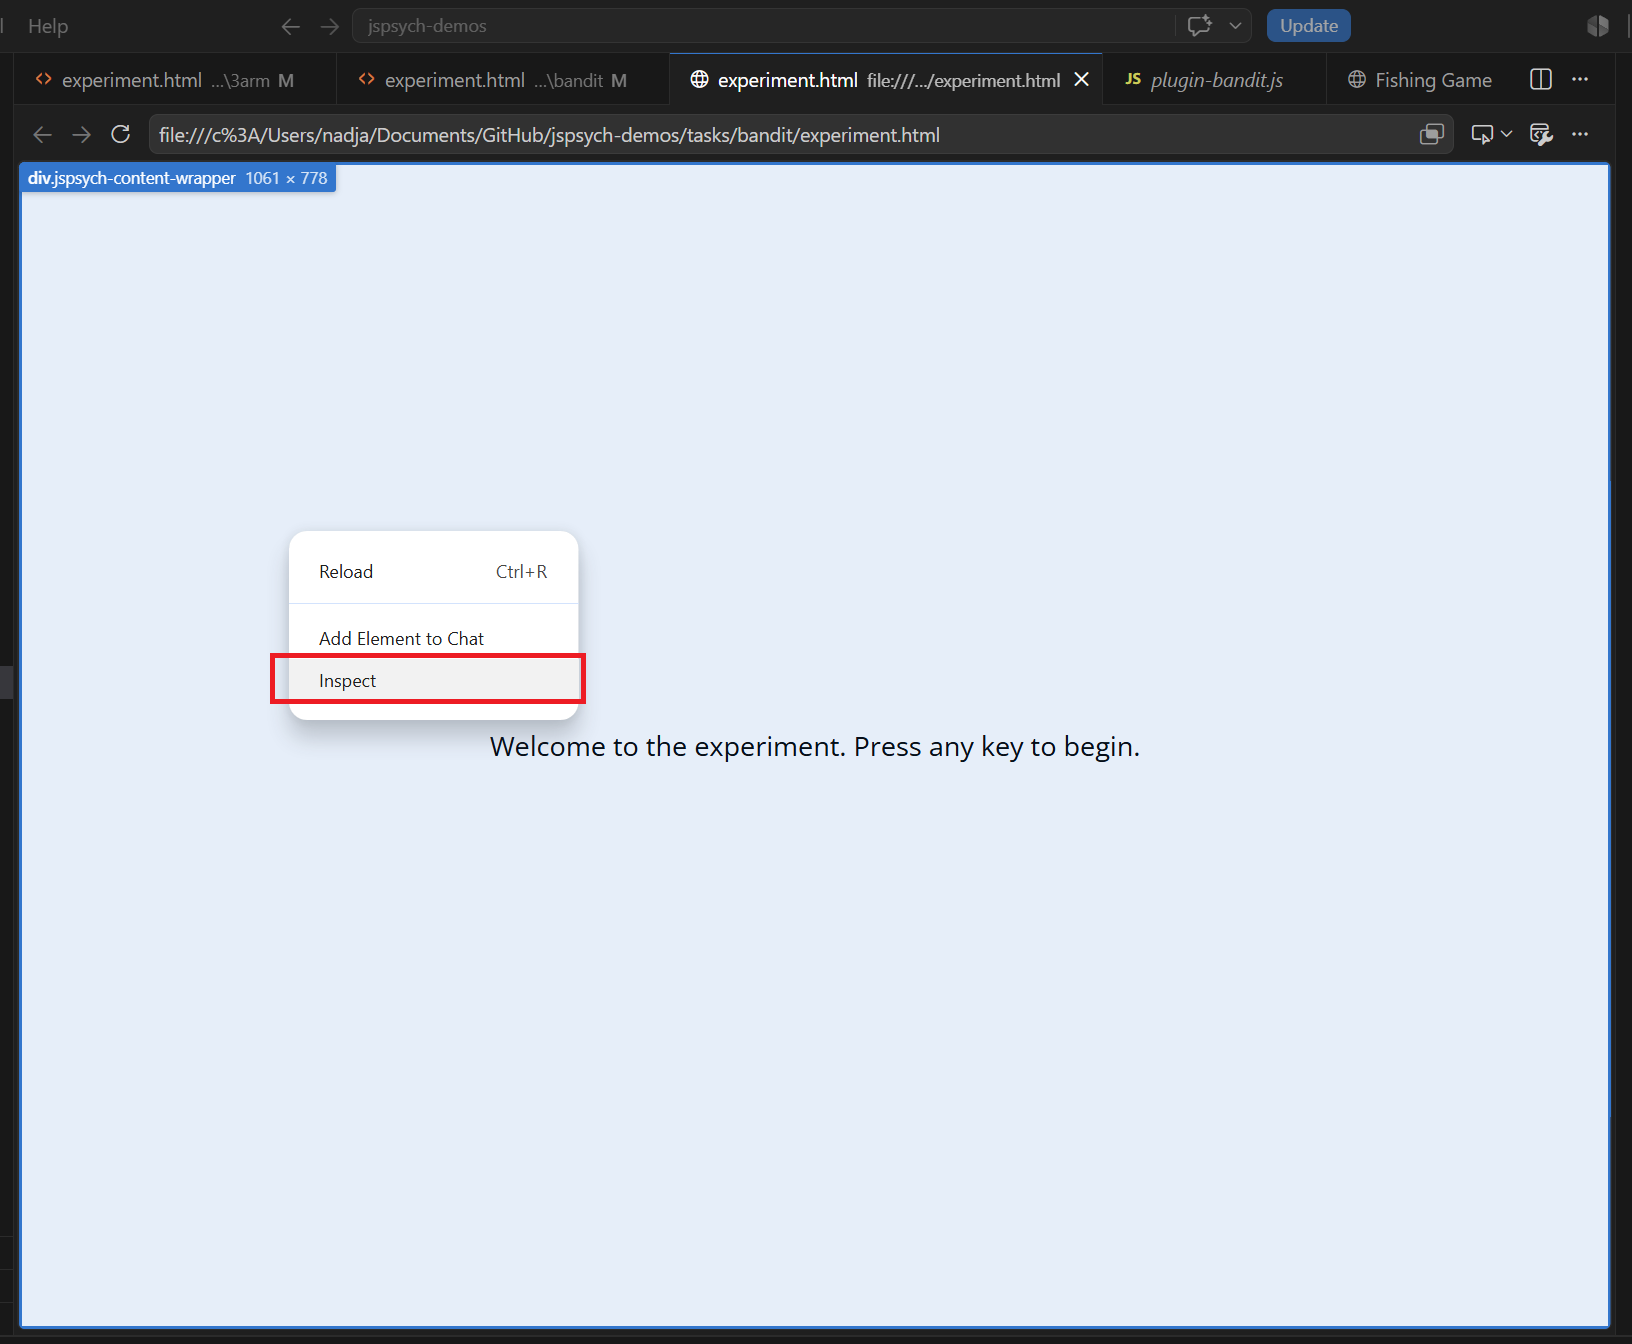
- Inspect for suspicious behavior. See the common errors page for debugging ideas and potential fixes.
Testing changes locally
- If you don’t have Ruby, install it. Make sure to get 3.x, 4.x doesn’t support some of the things we need
- Open PowerShell if you’re on Windows or Terminal if you’re on Mac.
- Type in gem install bundler
- Navigate to your project folder using cd your-project-path
- Type in dir Gemfile
- Type in bundle install
- Type in bundle exec jekyll serve –baseurl “/jspsych-demos”
- After this, you should be able to see an address hosting the website with the changes you’ve made.
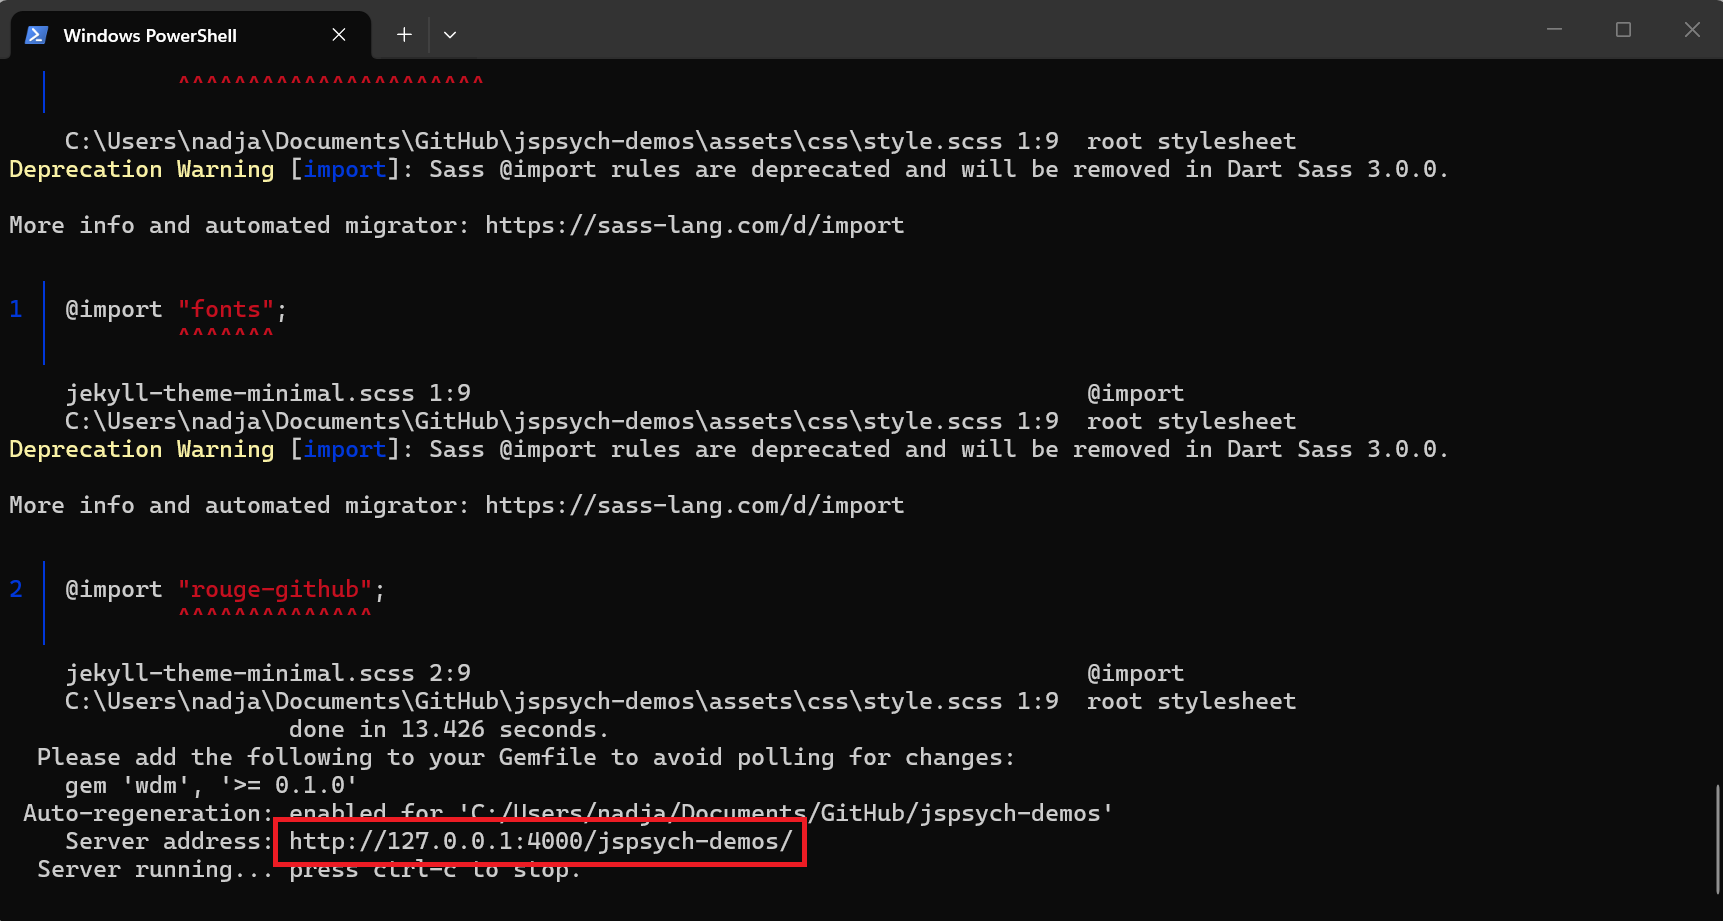
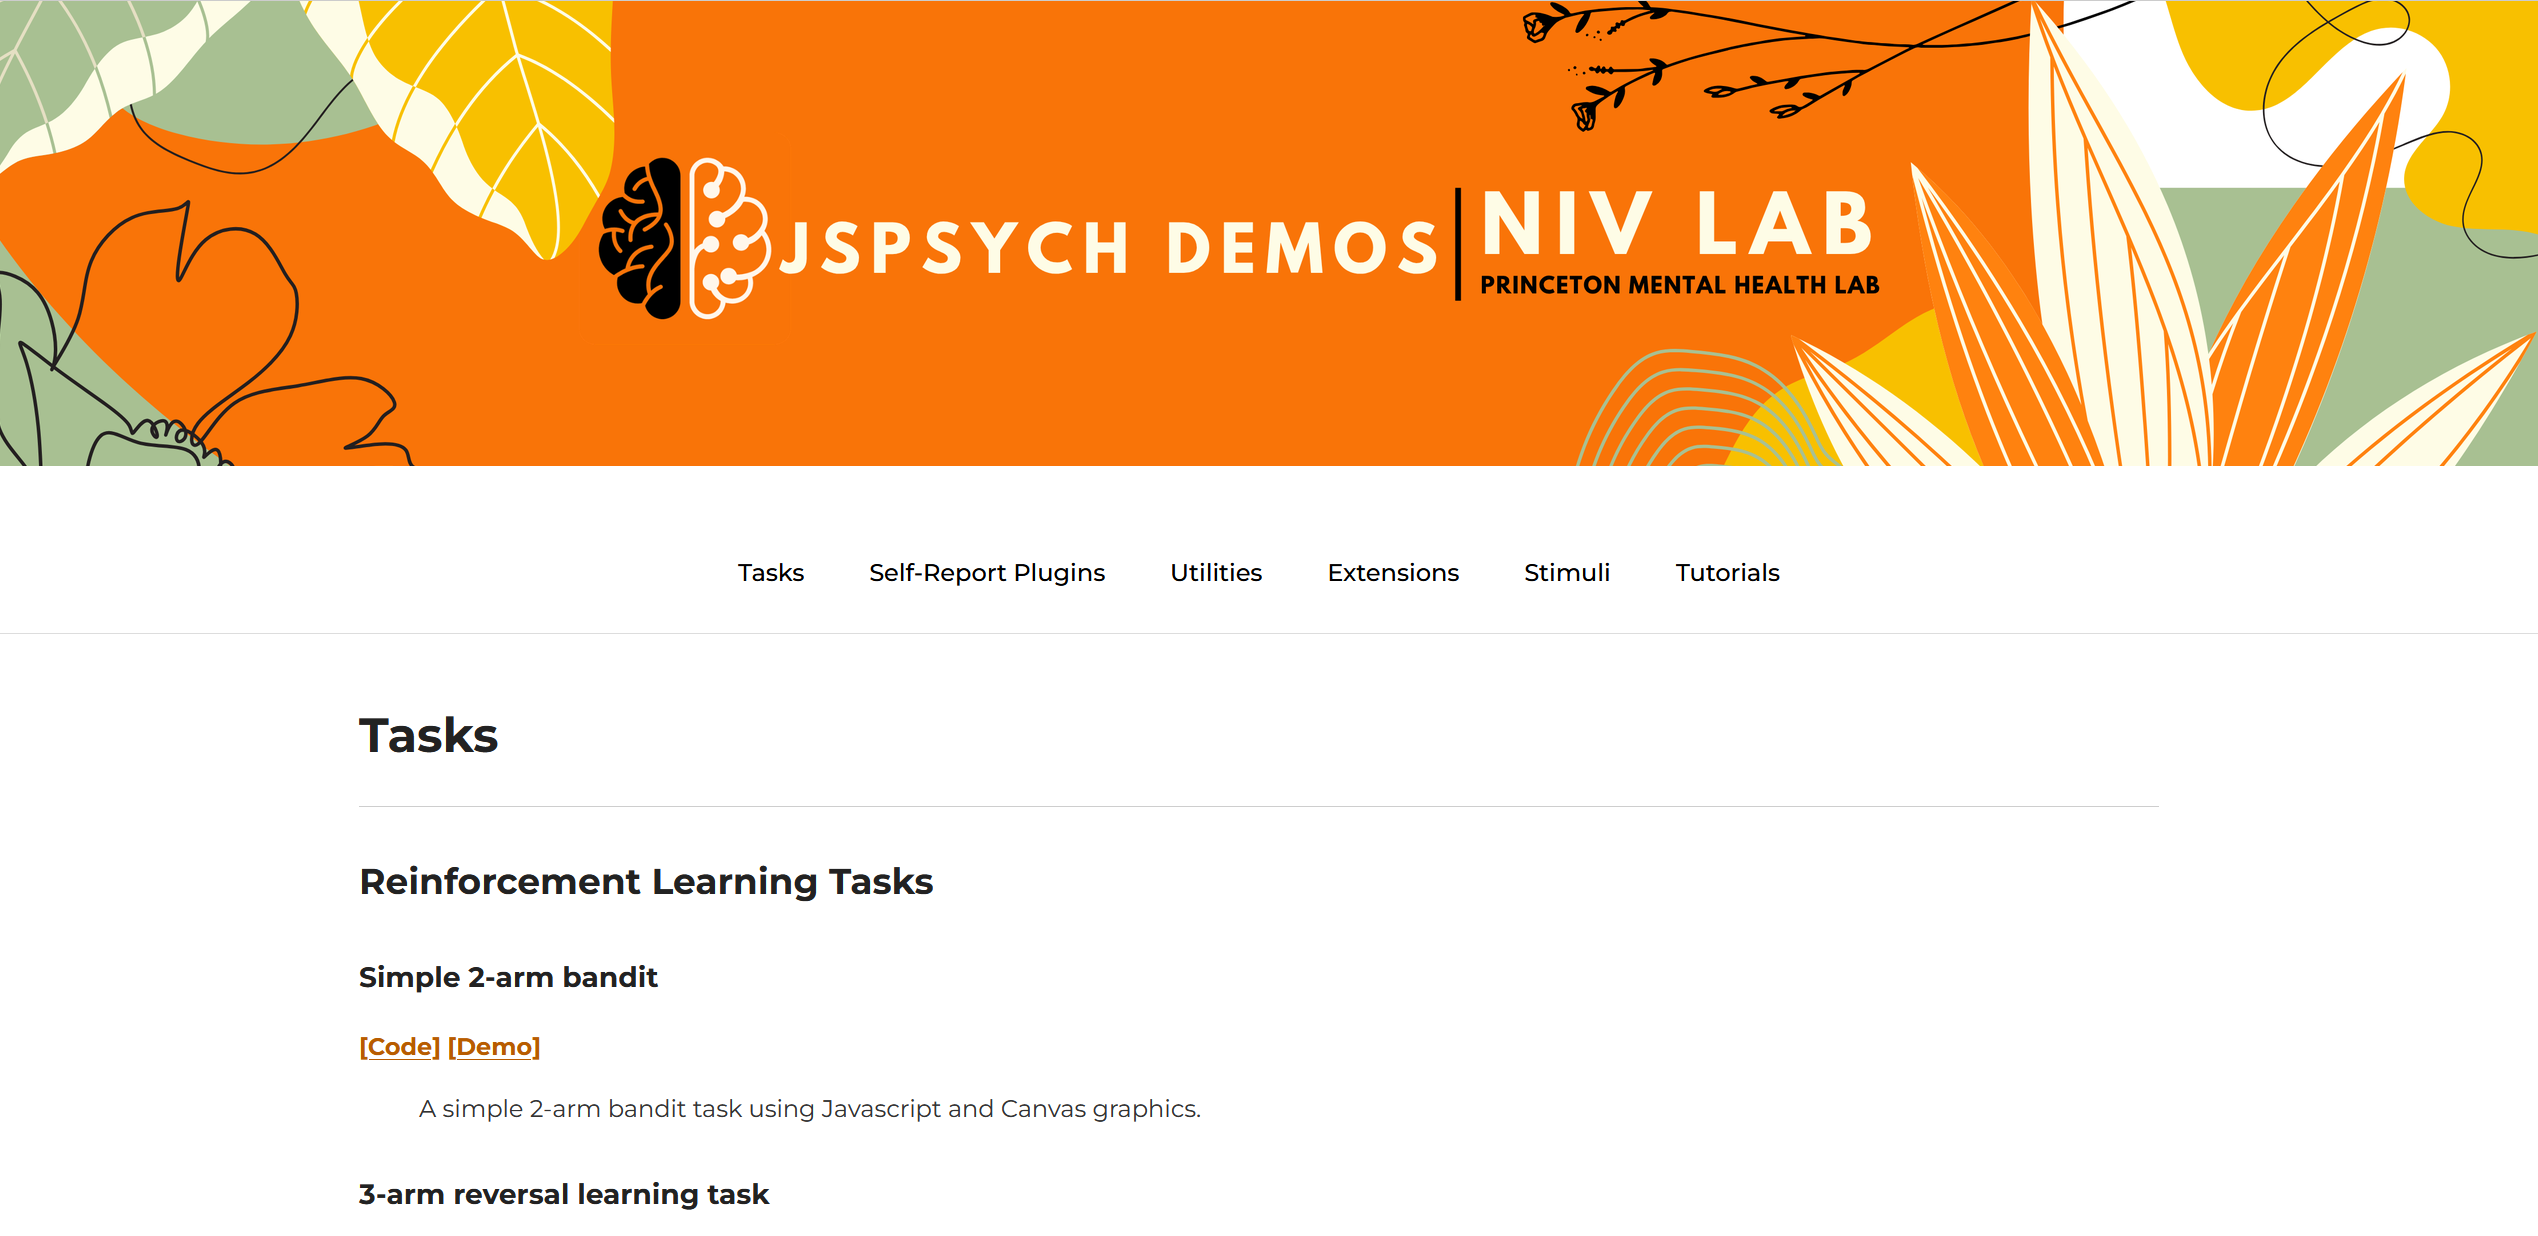
- Once you open the link, you should see a page like this:
Subsequent testing
- Once everything is installed, it is enough to just open PowerShell/Terminal, cd into the correct folder, and run bundle exec jekyll serve –baseurl “/jspsych-demos”
Adding changes to the website
- If there are any changes you would like to make to the overall website content, use index.md
- If there are navigation bar changes you would like to make, use nav.html
- For stylistic changes, use style.scss and custom.js in the assets folder.
- Run bundle exec jekyll build to test the production build. You won’t be able to see the website locally. What you’re looking for is changes in the _site folder and whether they reflect what you would expect to see.